Basics
Starting point if you have no experience with the game at all. You will also learn some useful tricks.
Nova Ragnarok
 Wind Cutter
My personal vision of this build relies on Dungeon Farming mainly, such as Einbech 3, Juperos, Thanatos & many others. In this guide we will focus building around that concept, but before jumping in take a look at the pros and cons of it.
ACD required 34%
ASPD required 185
Max. WC/s 3
Has 0.5s Cast Delay, 0.3s CD.
It requires 34% ACD & 185 ASPD.
Unable to cast more than 3/s.
Equipment shows the best in slot gear by default. In some cases there's budget alternatives to select from.
Grading ![]() Thanatos Great Sword-AD is generally not worth it, unless you have zeny to burn.
Thanatos Great Sword-AD is generally not worth it, unless you have zeny to burn.
Battle Stats doesn't include RNG enchants, Pet Attack (7%), Base Weapon Attack (240), Refine Attack (+12; 96), Refine P.ATK (+12; 24), Grading Bonuses or Shadow Gear Refine Attack (+9; 9).


Minimum damage against
Dummy
Small
3,611,143
Medium
3,892,322
Large
4,351,267
Porcellio (Earth 4)
6,558,123
Abyssman (Neutral 4)
4,351,267
Mineral (Neutral 4)
4,351,267
Apocalypse (Holy 2)
4,351,267
Archdam (Ghost 2)
3,369,452
Robot (Dark 2)
4,351,267
Excavator (Poison 2)
4,006,667
Hallucigenia (Poison 2)
5,030,573
Assassin Fly (Poison 2)
5,470,283
Gazeti & Striker (Earth 2)
6,302,406
Evolved & Mutated Pupa (Earth 2)
5,780,054
Ghost (Undead 1)
4,307,608
Lude (Undead 2)
5,030,573
Brutal (Neutral 2)
4,351,267
Gan (Neutral 1)
3,892,322
Anger (Fire 4)
6,711,969
Horror (Poison 4)
4,307,608
Resentment (Ghost 4)
3,892,322
Regret (Ghost 4)
4,351,267
The core of any build. These are tailored to squeeze the maximum amount of damage from  Wind Cutter. For a more hybrid approach using
  Ignition Break,
  Sonic Wave or
  Storm Slash focus on Luk & Crt instead of Dex & Con.
Although they can be minmaxed, it's not a requirement.
The better the balance between them, the higher the efficiency and damage output.
Atk 547
Atk 71%
Class 0%
Small 57%
Medium 87%
Large 87%
All 14%
Demon 29%
Angel 29%
Melee 148%
WC 170%
Mastery 40
These are the minimum required skills points to perform the build accordingly. Any extra points can be allocated freely at your will.
Click/tap on the skills to learn more about them.
RecommendedSurvivalUtility
This consumables should be at the top of your refill category as they serve you greatly.
RecommendedOffenseDefenseUtility
This are your general instance/farming consumables. Only use them when you're in dire need of them.
OptionalSurvivalOffenseUtility
Not core consumables, but very helpful to have around. Often used to exploit your damage potential or farming efficiency.
RecommendedSurvivalOffenseDefenseUtility
Essentially what makes you a Rune Knight. This is my personal must to have list, but feel free to ignore the Utility ones.
Offensive
Defensive
Survival
Utility
The following list is from my personal use. If you don't see an specific list, chances are I simply use the general autoloot.
General
@autoloot 0.9
@alootid +25809|+25810|+25811|+25812|+25813|+25814|+9517
@alootid +34716|+34717|+34712
@alootid +25633|+25638|+35055|+100003|+100004
@alootid +985|+984
@alootid -985|-757|-756|-747|-997|-938|-727
@alootid +969|+7230|+7642
@alootid +25266|+25267|+25265|+25264|+7564|+25633|+25638|+25899|+35055|+100003|+100004
Farming is all about optimizing your efficiency, speed and damage. While some items here are required for a better experience, they're not a must.
Mouse over/tap on the images/names to see the applicable bonus.
General
Thanatos
Abyss Lake 4
Others
First and foremost, this section is made both for new and returning players with a more in depth explanations on what you have seen above, to answer common questions, teach you new things and much more. If you like learning, this is your place.
Skip If you don't care about the basics jump directly to Earlygame
The tutorial is your introduction to Nova Ragnarok. It starts with Mom entering your room and it unfolds a small series of events where she teaches you the basics of the game, gives you some gear walks you through the starter classes and finishes it off by sending you to the Eden Group.
Article: Tutorial / Mom
Eden Academy effectively counts as the next step of the tutorial. We will dive into this later, as this goes all the way up to level 150.
Article: Eden Academy
Leveling becomes quite hectic as you progress. This section focuses entirely on farming methods & locations.
Consider ![]() Battle Manual - Not a must, but to keep in mind for your journey.
Battle Manual - Not a must, but to keep in mind for your journey.
An ancient technique using a Scaraba to kill for you. Commonly used at Rock Ridge. You're able to rebirth and get back to 99 with it. Refer to the Market to buy one.

The Eden Group article covers most of it. The only problem might be that some of them might be slightly outdated.
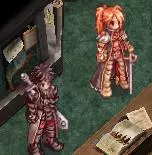
One of the best and most commonlu used sources is located at Eden Group. The difficulty mostly relies on finding a party and surviving groups of mobs.
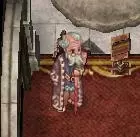
Generally a good alternative for solo players. Located on the first & second floor of Eden Group.
Could be considered a dark territory. As curating a list might not be worthy it, the best I could recommend is checking the Wikipedia Quests category.
Mainly through the Warper NPC. You can either select Dungeons or Illusion Dungeons. If you're looking for recommendations scroll down.

Any leeching service is often more efficient at higher levels, but they range from all levels. A good place to look out for them is at Eden Market or Discord.
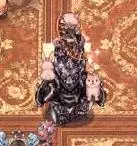
As simple as clicking on the map and checking the levels of each area scouting your way through. You could also go by your pre-renewal old experiences.

Farming is essentially what this game is mostly about. This section focuses in farming methods directly tied or correlated to zeny acquisition and / or gear progression.
Consider ![]() Guyak Pudding - Only at higher level and to optimize your runs.
Guyak Pudding - Only at higher level and to optimize your runs.
Consider ![]() Bubble Gum - Pretty niche, but it usually outweights the cost.
Bubble Gum - Pretty niche, but it usually outweights the cost.
Purely based on luck. You could either spend few minutes, or few hours farming one of these. An example of this would be farming ![]() Purple Ferus Card.
Purple Ferus Card.
Income method
Time spent
Difficulty
Practice commonly known for selling your loot to an NPC to profit some zeny. An example of this would be farming at Thanatos Tower F12.
Income method
Time spent
Difficulty
Specific items oriented. Using an Autoloot list is often recommended to avoid trash loot. An example of this would be farming ![]() Old Gear.
Old Gear.
Income method
Time spent
Difficulty
Mostly reliant on time or zeny. Acquiring them is the easiest part, refining tends to be the issue. An example of this would be farming ![]() Illusion Sprint Shoes.
Illusion Sprint Shoes.
Income method
Time spent
Difficulty
There is an old, outdated article, I made back then that it could help you understand a bit better how they work. Kindly look at the Weeklies Spreadsheet.
Income method
Time spent
Difficulty
Arguably the best and worst, due to how sporadic it is. Refer to the full list Summer Festival, Trickster King's Invasion, Helping Santa & Valentine's Day. An honorable mention to Scheduled Events.
Income method
Time spent
Difficulty
| Link | Description | ||||||||||||||||||
|---|---|---|---|---|---|---|---|---|---|---|---|---|---|---|---|---|---|---|---|
| NovaRO Main Site | Useful to check news, your character, the market & spending your well earned real life money. | ||||||||||||||||||
| NovaRO Wikipedia |
|
||||||||||||||||||
| NovaRO Main Site | Useful to check news, your character, the market & spending your well earned real life money. | ||||||||||||||||||
| NovaRO Calculator | Homemade, probably still in progress. | ||||||||||||||||||
| NovaRO Forum | Perfect to report a bug, write a suggestion or complain, besides that, ignore it. | ||||||||||||||||||
| NovaRO Discord | Specially useful if you join a class specific channel. | ||||||||||||||||||
| IronRO Wiki Quest List | This is only useful if you're all about nostalgia and want to do old forgotten quests. | ||||||||||||||||||
| Divine Pride | Amazing database. You can check almost anything and most importnatly, future content. | ||||||||||||||||||
| Various Tools | A bit outdated, but still present useful tools for you to use. | ||||||||||||||||||
| Muh Calculator | Significant calculator both for ATK and MATK. Let's you plan ahead. | ||||||||||||||||||
| RateMyServer | Honestly, with all the above, useless, but might as well throw it out there. |
| Category | Command | Description | Usage |
|---|---|---|---|
| Navigation | @go | Gives you the ability to teleport to any town. If you don't type any city, you will get a full list of the available locations. | @go prontera |
| @navi | Pinpoints the location of a coordinate. |
@navi prontera 100,100/navi prontera 100/100 |
|
| @return | Teleports you back to your save point. Specially useful to leave instances. | @return |
|
| Information |
@bs
@battlestats
|
Gives you detailed information about your all your stats. Pretty helpful to understand formulas and behaviors. | @bs |
|
@ii
@iteminfo
|
Resourceful command to check every single item in the game. You can even preview outfit this way, to avoid misunderstandings. |
@ii enriched elunium@ii 12345 |
|
|
@wn
@whatnpc
|
My go-to option to verify if an NPC is selling an specific item that I'm looking for. Always good to use this command before @ws. |
@wn enriched oridecon@wn 54321 |
|
|
@ws
@whosells
|
Directly aimed towards players selling specific items. The UI is compelling enough for you to understand it form the get go. |
@ws new wave sunglasses@ws 55555 |
|
|
@wi
@whereis
|
A mob finder. Quite useful when doing weeklies. |
@wi poring@wi 123 |
|
|
@mi
@mobinfo
|
To validate stats from a specific mob. Could be used to verify the LUK required to crit, or the DEX needed to hit, even the PEN or MPEN. |
@mi valkyrie@mi 9999 |
|
| Farming |
@autoloot
|
The shorten version works, but sometimes the values don't work properly, so stick to the longhand name. | @autoloot 85.5 |
|
@alootid
|
This is quite essential when farming for specific loots. You can either whitelist or blacklist up to 20 of them in any combination. It's quite finnicky to reset, so the best way is simply going to character selection and coming back. |
@alootid +123@alootid -123|-143|+1465 |
|
|
@nopickup
|
You would be surprised how handy could this be specially when you're clicking a lot. The name references to what it does, really. |
@nopickup |
|
| Party |
@autoloot
|
The shorten version works, but sometimes the values don't work properly, so stick to the longhand name. | @autoloot 85.5 |
|
@alootid
|
This is quite essential when farming for specific loots. You can either whitelist or blacklist up to 20 of them in any combination. It's quite finnicky to reset, so the best way is simply going to character selection and coming back. |
@alootid +123@alootid -123|-143|+1465 |
|
|
@nopickup
|
You would be surprised how handy could this be specially when you're clicking a lot. The name references to what it does, really. |
@nopickup |
| NPC | Description | Image |
|---|---|---|
This is use order.


10 seconds

1 minute


5 minutes

